
How to Link Your Images to a URL in Blogger
In Compose view:
1. Open a blog post and insert a picture.
2. Click on the image to view the toolbar of options for the image. Select the 'Edit Link' option.


4. Remove the link you see with the website URL you'd like the picture to link to. You can also opt to have the link "Open in a new window" and test the link from this screen!

5. Click "OK" and you're done!
In HTML view:
1. While in 'Compose' view insert your image like normal.
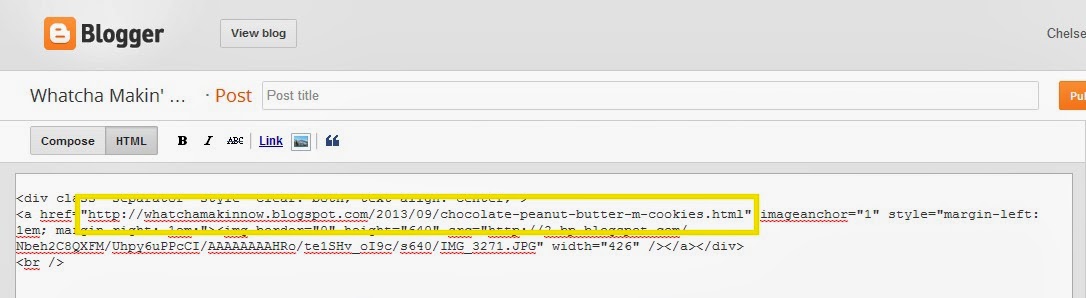
2. Click over to the 'HTML' tab to view the coding of the post. Look in the code for <a href=. This will show you the current URL and will always end in .jpg or .png because it's an image.
{Click below image to view larger.}

3. Replace the image link with the website URL you'd like the image to link to. The link should be entered within like so: <a href="linkhere">
{Click below image to view larger.}
4. If you'd like the image to open in a new window, add target="_blank".
{Click below image to view larger.}

5. Click back to 'Compose' view and finish you post like normal!
Want to learn more about HTML? Here's a printable cheat sheet for you!
